DIY Home: Transforming Your Kitchen with an L-Shaped Layout
Category : bkitchens | Sub Category : bkitchens Posted on 2023-10-30 21:24:53
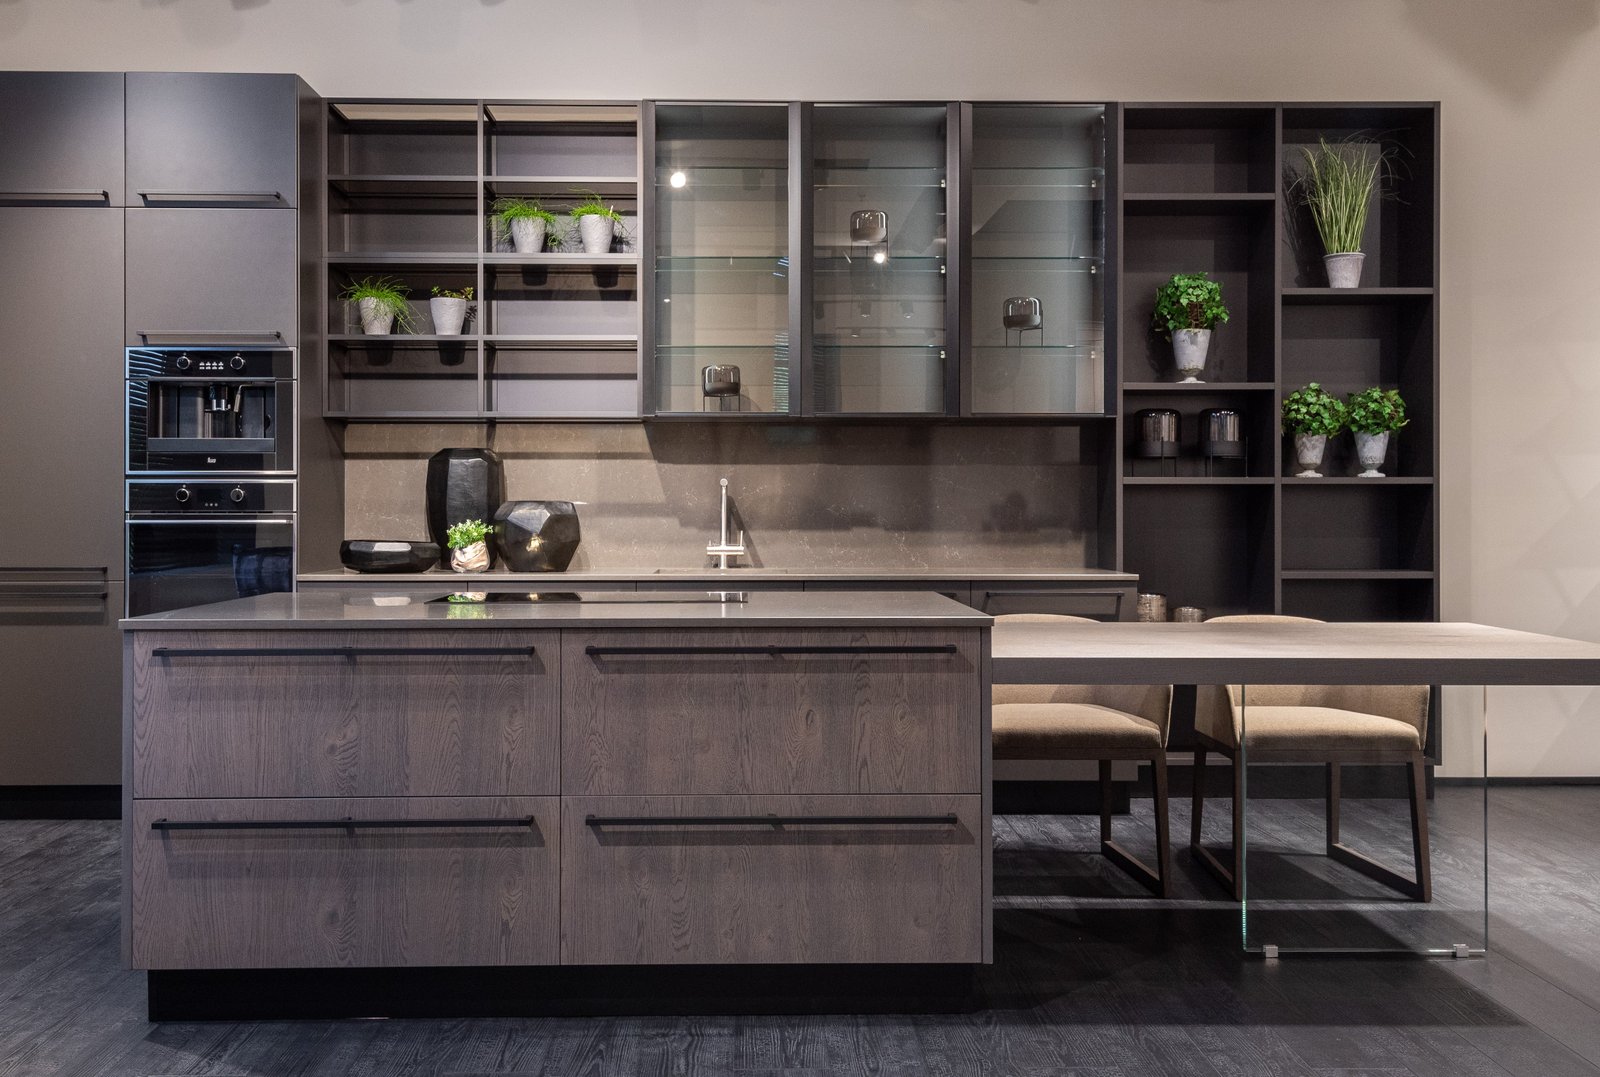
Introduction: The kitchen is the heart of any home, and its layout plays a vital role in optimizing functionality and space utilization. For homeowners looking to revamp their kitchen, an L-shaped layout offers versatility, efficiency, and a modern touch. In this DIY Home blog post, we will explore the benefits and step-by-step guide to creating your very own L-shaped kitchen. Benefits of L-Shaped Kitchens: 1. Enhanced functionality: An L-shaped kitchen maximizes your workspace by utilizing two adjacent walls. This layout provides an efficient workflow, with distinct zones for cooking, prepping, and cleaning, while keeping everything within easy reach. 2. Ample storage options: The extended corners in an L-shaped kitchen provide more cabinet and countertop space. This allows for better organization and storage solutions, reducing clutter and ensuring a clean and organized culinary experience. 3. Increased social interaction: L-shaped kitchens offer an open layout, making it easier for the cook to interact with family and guests. This kitchen design encourages seamless communication and enhances the overall cooking and entertaining experience. Step-by-Step Guide to Create an L-Shaped Kitchen: Step 1: Evaluate your kitchen space: Take measurements of your kitchen area to determine if an L-shaped layout is feasible. Consider factors such as doorways, windows, and existing plumbing and electrical lines. Step 2: Plan the positioning: Identify the two walls where the L-shape will be formed. This usually involves positioning countertops and cabinets along one wall and extending them to the adjacent wall. Keep in mind factors like ergonomics, counter height, and ease of movement while planning the layout. Step 3: Choose cabinetry and countertops: Select cabinets and countertop materials that match your kitchen's style and functionality requirements. Opt for cabinets that maximize storage space while complementing the overall aesthetics of your home. Consider durable countertops such as quartz or granite that are resistant to stains, scratches, and heat. Step 4: Install plumbing and electrical: If necessary, reroute plumbing and electrical lines to accommodate the L-shaped kitchen design. Seek professional help if you are unsure about handling these tasks yourself to ensure safety and code compliance. Step 5: Install cabinets and countertops: Follow manufacturer instructions and guidelines to install your chosen cabinetry and countertops. Use proper tools and techniques, or enlist the help of a professional if needed, to ensure accurate installation and a polished look. Step 6: Accessorize and personalize: Add the finishing touches to your L-shaped kitchen by incorporating personalization and accessories. Choose suitable lighting fixtures, stylish backsplashes, and functional kitchen hardware to enhance the overall appeal and functionality of your space. Conclusion: Creating an L-shaped kitchen for your home is an excellent DIY project that can transform your culinary space. By following this step-by-step guide, you will not only optimize functionality and storage but also add a touch of sophistication and modernity to your kitchen. Get ready to enjoy a more efficient and aesthetically pleasing cooking experience in your upgraded L-shaped kitchen. For a broader exploration, take a look at http://www.svop.org also for more http://www.mimidate.com
Leave a Comment:
SEARCH
Recent News
- Zurich, Switzerland is known for its multicultural atmosphere and diverse culinary scene. One of the lesser-known gems of Zurich's food scene is Sudanese cuisine. Sudanese cuisine is a reflection of the country's diverse cultural influences, blending Arabic, African, and Mediterranean flavors to create a unique and delicious culinary experience.
- Zurich, Switzerland: A Culinary Journey through Regional Cuisine
- Zurich, Switzerland is known for its stunning natural beauty, vibrant arts scene, and strong economy. However, what many people may not know is that this dynamic city also offers a diverse culinary experience that includes delicacies from around the world. One such cuisine that has found a home in Zurich is Philippine cuisine.
- Zurich, Switzerland is known for its picturesque views, stunning architecture, and vibrant cultural scene. Located in the heart of Europe, Zurich offers a mix of traditional Swiss cuisine and international flavors. One particular cuisine that has been making waves in Zurich is Paraguayan cuisine.
- Zurich, Switzerland is a city known for its stunning views, picturesque streets, and vibrant culture. It is also a melting pot of diverse culinary influences, with a wide range of cuisines to choose from. One such cuisine that has made its mark in Zurich is Norwegian cuisine.
- Zurich, Switzerland, and Montreal, Canada, are two vibrant cities known for their distinct cultural characteristics. While Zurich is renowned for its picturesque landscapes, rich history, and high standard of living, Montreal is famous for its diverse population, vibrant arts scene, and mouth-watering cuisine. In this blog post, we will delve into the delectable culinary offerings of Montreal and explore how its unique food scene sets it apart from the culinary landscape of Zurich.
- Zurich, Switzerland: Exploring Hungarian Cuisine
- Zurich, Switzerland is a city known for its picturesque surroundings, stunning architecture, and vibrant culture. As a popular destination for both tourists and expats, Zurich offers a diverse culinary scene with cuisine choices from around the world. One lesser-known but delightful culinary gem you can find in Zurich is Guatemalan cuisine.
READ MORE
6 months ago Category : bkitchens

Zurich, Switzerland is known for its multicultural atmosphere and diverse culinary scene. One of the lesser-known gems of Zurich's food scene is Sudanese cuisine. Sudanese cuisine is a reflection of the country's diverse cultural influences, blending Arabic, African, and Mediterranean flavors to create a unique and delicious culinary experience.
Read More →6 months ago Category : bkitchens

Zurich, Switzerland: A Culinary Journey through Regional Cuisine
Read More →6 months ago Category : bkitchens

Zurich, Switzerland is known for its stunning natural beauty, vibrant arts scene, and strong economy. However, what many people may not know is that this dynamic city also offers a diverse culinary experience that includes delicacies from around the world. One such cuisine that has found a home in Zurich is Philippine cuisine.
Read More →6 months ago Category : bkitchens
